DEV构建博客
Jekyll构建博客
1. 基本流程
安装Ruby: Jekyll是一个基于Ruby的静态网站生成器,因此你需要先安装Ruby环境。你可以从Ruby官网下载并安装。
安装Jekyll: 安装Ruby后,你可以通过RubyGems安装Jekyll。打开终端或命令提示符,输入以下命令:
1
gem install jekyll bundler jekyll-paginate
创建一个新的Jekyll网站: 使用以下命令创建一个新的Jekyll网站:
1
jekyll new myblog
这将创建一个名为
myblog的新文件夹,其中包含了Jekyll网站的基本结构。浏览你的网站: 进入你的网站文件夹,然后启动本地服务器:
1
2
cd myblog
jekyll serve
现在,你可以在浏览器中访问
http://localhost:4000来查看你的网站。编辑和定制: 你可以编辑
_config.yml文件来定制你的网站设置,如标题、描述等。网站的内容和文章通常放在_posts文件夹中,你可以添加或编辑Markdown文件来发布新的博客文章。部署: 当你准备好将网站部署到互联网上时,你可以使用GitHub Pages等服务。将你的Jekyll网站推送到GitHub仓库,并配置GitHub Pages以使用该仓库作为源。
持续更新: 你可以继续添加新的文章和内容到你的网站,并使用
jekyll serve命令来预览更改。使用主题: Jekyll有许多现成的主题,你可以下载并应用它们来改变你网站的外观。
插件: 根据需要,你可以添加插件来扩展Jekyll的功能。
优化: 为了提高网站的性能和SEO,你可能需要对网站进行一些优化,比如使用CDN、优化图片等。
2. 使用模板
该博客使用了https://github.com/cotes2020/jekyll-theme-chirpy模板
Wiki:Home · cotes2020/jekyll-theme-chirpy Wiki (github.com)
配置内容如下:
- 配置基本信息,标题等
- 配置分类,自分类
- 配置Favicon: realfavicongenerator.net
Your generated favicon (realfavicongenerator.net)
3. 自动创建
- 在Gemfile中添加compose
1
gem 'jekyll-compose', group: [:jekyll_plugins]
bundle install安装- 使用bat自动创建打开文件
1
2
3
4
5
6
7
8
9
10
11
12
13
14
15
16
17
18
19
20
21
22
23
24
25
26
27
28
29
30
31
32
33
34
35
echo off
set postTitle=%1
set currentDaytime=%time:~0,2%H%time:~3,2%M%time:~6,2%S
rem check if post name is provided
if "%1"=="" (
    echo need a argument as post title, using ctime as defalut
    set postTitle=%currentDaytime%
)


set currentDate=%date:~0,4%-%date:~5,2%-%date:~8,2%
set postFileName=%currentDate%-%postTitle%.md
echo %postFileName%
rem use jekyll compose to create a post
call bundle exec jekyll compose %postTitle%
rem get pwd
set currentDirectory=%cd%

rem get typora path
rem ###############################################################
rem ########### CHANGE THIS PATH TO YOUR OWN EDITOR PATH ##########
rem ###############################################################
set typoraPath="C:\Program Files\Typora\Typora.exe"


if not exist %typoraPath% (
    echo Typora not exist, no editor will be opened
    exit /b 1
)
rem get full path
set postFilePath=%currentDirectory%\_posts\%postFileName%

rem open blog by typora
start "" %typoraPath% %postFilePath%
exit /b 1
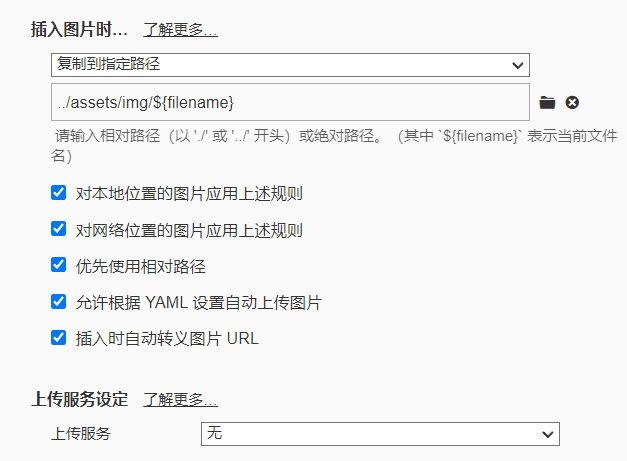
4. 静态资源管理
Typora图片设置:
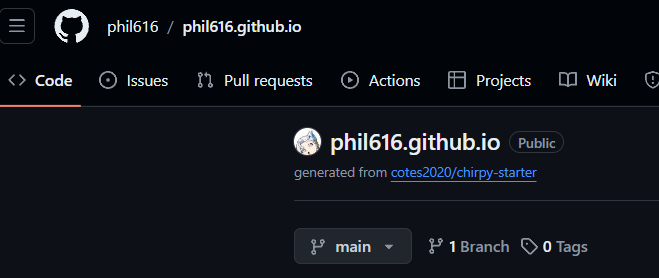
5. Github Pages
- 创建page仓库
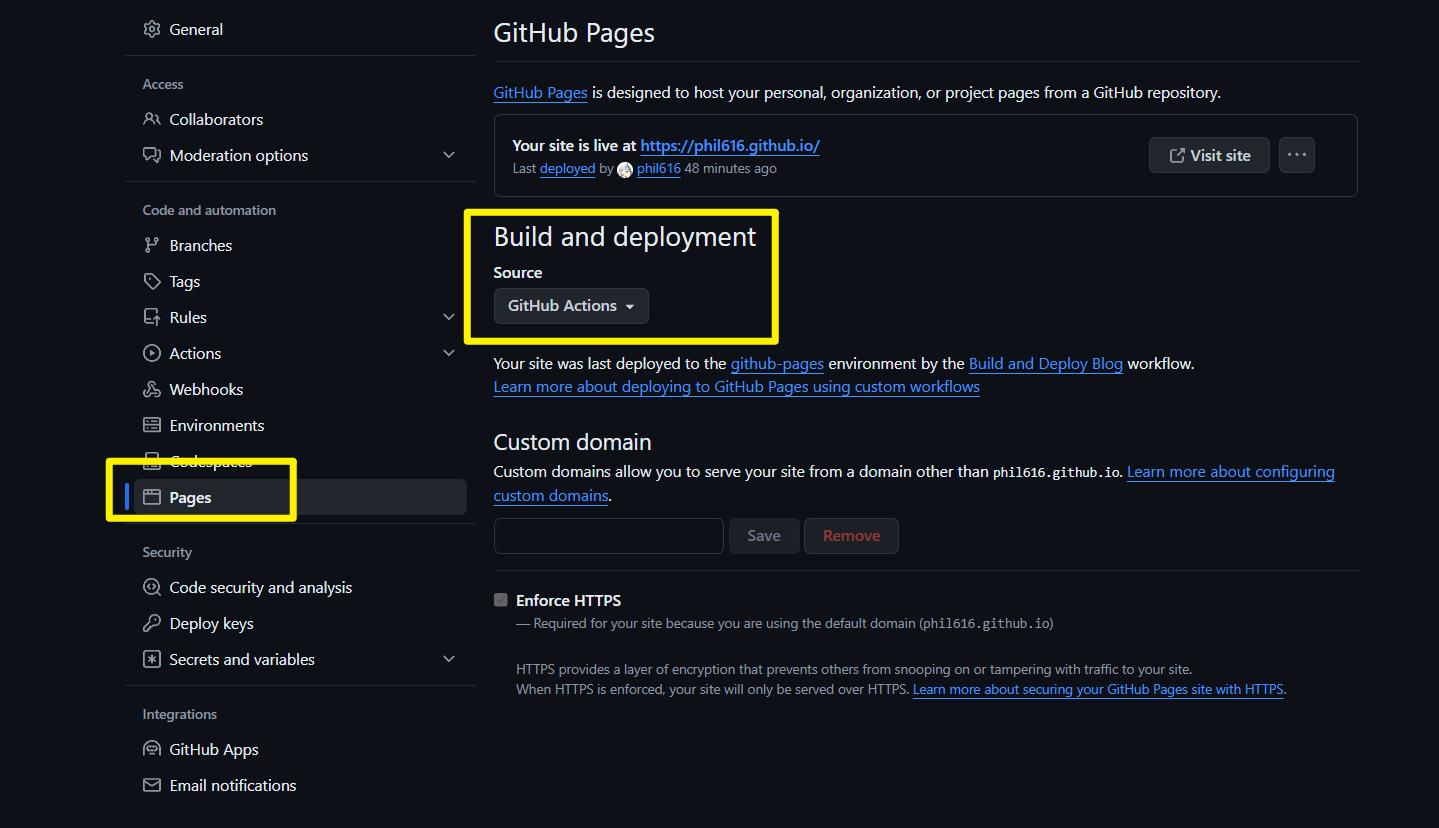
- 启用Pages
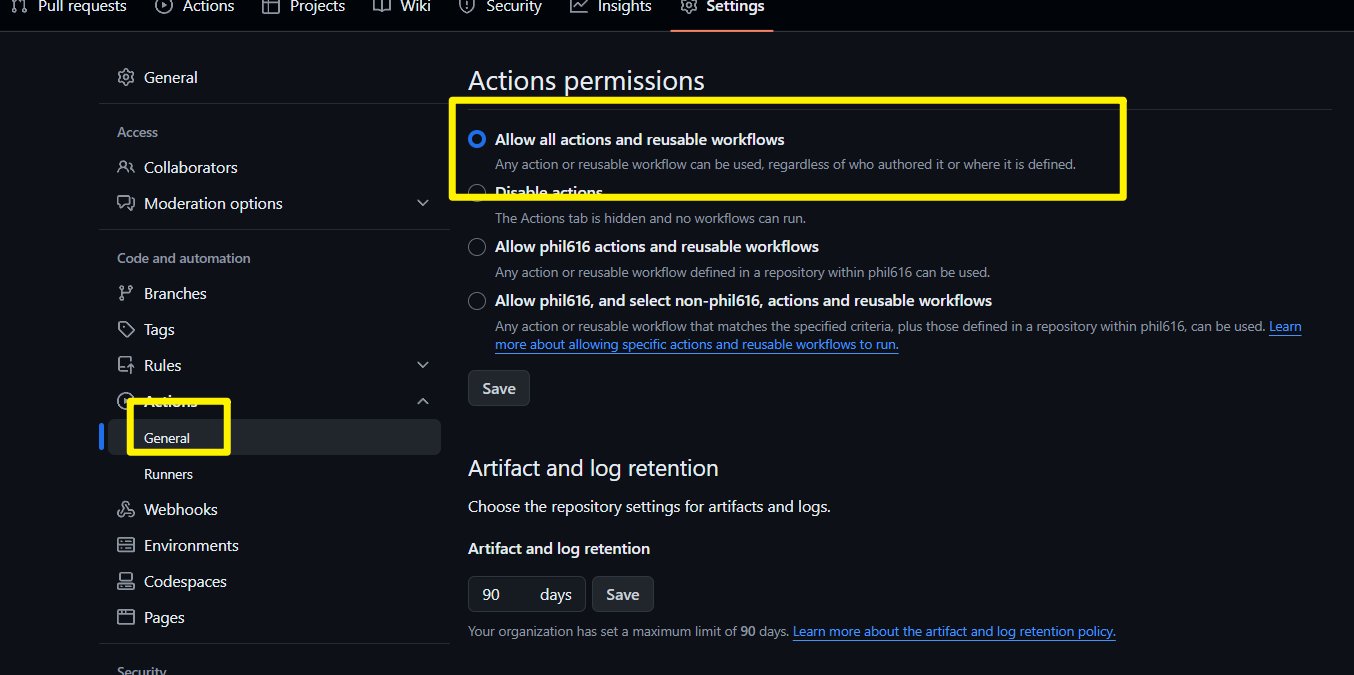
- 启用Actions
- 配置workflow
这里使用的是默认的workflow
1
2
3
4
5
6
7
8
9
10
11
12
13
14
15
16
17
18
19
20
21
22
23
24
25
26
27
28
29
30
31
32
33
34
35
36
37
38
39
40
41
42
43
44
45
46
47
48
49
50
51
52
53
54
55
56
57
58
59
60
61
62
63
64
65
66
67
68
69
70
71
72
73
74
name: "Build and Deploy Blog"
on:
  push:
    branches:
      - main
      - master
    paths-ignore:
      - .gitignore
      - README.md
      - LICENSE

  # Allows you to run this workflow manually from the Actions tab
  workflow_dispatch:

permissions:
  contents: read
  pages: write
  id-token: write

# Allow one concurrent deployment
concurrency:
  group: "pages"
  cancel-in-progress: true

jobs:
  build:
    runs-on: ubuntu-latest

    steps:
      - name: Checkout
        uses: actions/checkout@v4
        with:
          fetch-depth: 0
          # submodules: true
          # If using the 'assets' git submodule from Chirpy Starter, uncomment above
          # (See: https://github.com/cotes2020/chirpy-starter/tree/main/assets)

      - name: Setup Pages
        id: pages
        uses: actions/configure-pages@v4

      - name: Setup Ruby
        uses: ruby/setup-ruby@v1
        with:
          ruby-version: 3.3
          bundler-cache: true

      - name: Build site
        run: bundle exec jekyll b -d "_site$"
        env:
          JEKYLL_ENV: "production"

      - name: Test site
        run: |
          bundle exec htmlproofer _site \
            \-\-disable-external \
            \-\-ignore-urls "/^http:\/\/127.0.0.1/,/^http:\/\/0.0.0.0/,/^http:\/\/localhost/"

      - name: Upload site artifact
        uses: actions/upload-pages-artifact@v3
        with:
          path: "_site$"

  deploy:
    environment:
      name: github-pages
      url: $
    runs-on: ubuntu-latest
    needs: build
    steps:
      - name: Deploy to GitHub Pages
        id: deployment
        uses: actions/deploy-pages@v4
- 检查工作流

每次上传后都应该检查是否成功部署
6. 检查Github LFS剩余量
大量图片可能导致Github LFS存储不足,需要定期检查
要查看GitHub上的Git Large File Storage(LFS)的剩余量,您可以按照以下步骤操作:
- 登录到您的GitHub账户。
- 点击页面右上角的个人资料照片,然后选择 Settings(设置)。
- 在设置页面的侧边栏中,选择 Billing(帐单)。
- 点击 Subscriptions(订阅)。
- 在页面上找到 “Git LFS data” 部分,这里会显示您的带宽和存储使用详情 。
- 如果您是组织的一部分,并且需要查看组织的Git LFS使用情况,您需要是组织的 所有者 或 帐单管理员。然后按照以下步骤操作:
同样点击页面右上角的个人资料照片,选择 Your profile(您的个人资料)。
- 在个人资料页面中找到 “Organizations(组织)” 部分,点击您所在的组织的图标。
- 在组织页面上,点击 Settings(设置)。
- 在设置页面的侧边栏中,选择 Billing(帐单),然后点击 Subscriptions(订阅)。
- 在 “Git LFS data” 下查看组织的带宽和存储使用情况 。